Is your pooch pawing your petunias? Here’s how to keep your dog out of your garden and away from your precious plants.
We want our dogs to eat well, but we don’t want them snacking on our heirloom vegetables and prized perennials. Nor do we want them digging up the daffodils.
How can you keep dogs from wrecking your garden?
Spray Nasty Odors
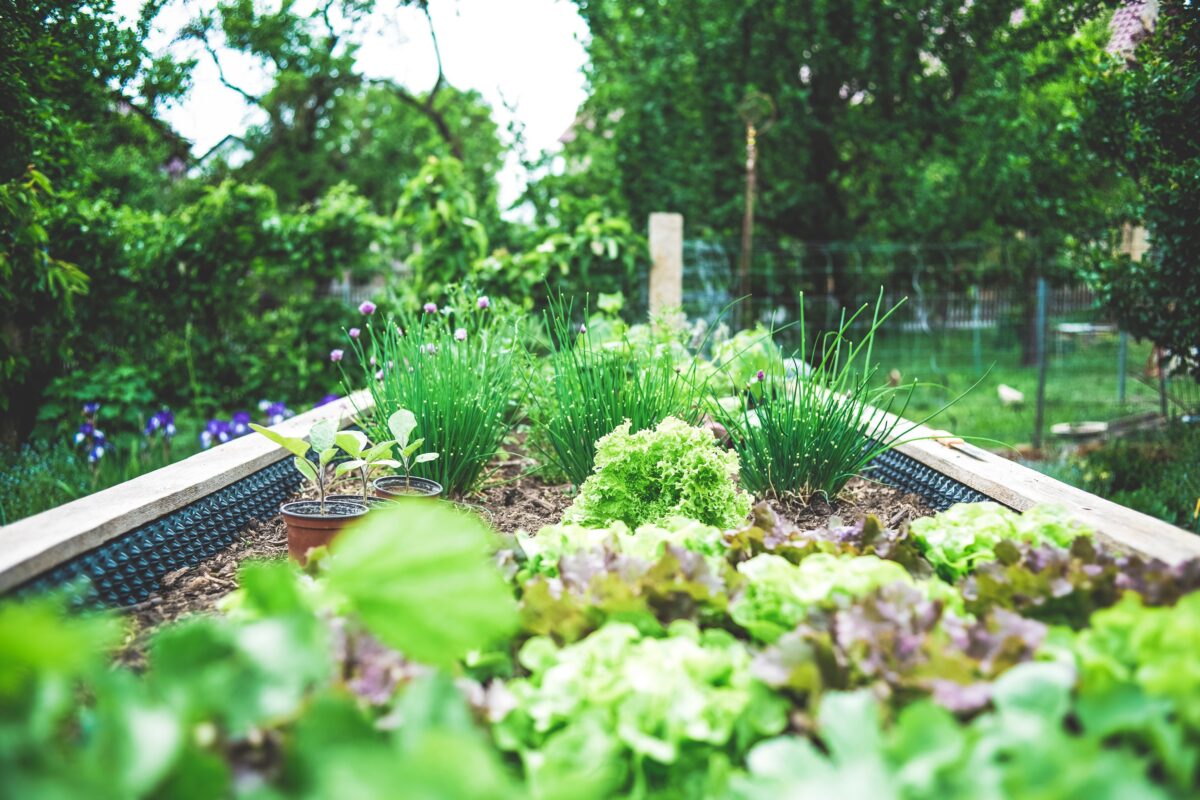
Your vegetable garden is a salad bar for your dog. To keep him away, spray plants with pungent white vinegar or apple bitter. Or plant marigolds between vegetable rows, which repel dogs and other backyard pests, such as Mexican bean beetles, aphids, squash bugs, and whiteflies.
However, don’t apply rabbit or deer repellents that contain coyote urine. Dogs love the smell of urine and will either roll in your sprayed plants or leave an odor of their own.
Sprinkle Yucky Tastes
Sprinkle powdered mustard or red pepper flakes around your plants. A few sniffs and licks of these unpleasant tastes will discourage your dog from returning to the area.
Fence Dogs In or Out
If you’ve got small dogs, a 16-inch fence border ($29 for 6 feet) will mark the perimeter of your garden and discourage them from trampling your seedlings. For large, spunky dogs, encase your vegetables in a chicken wire cage with a top enclosure, which fence out deer and rabbits, too.
Or, contain your dog in a fenced play area that’s roomy and filled with interesting toys and treats. However, if your dog likes burying things, don’t give him a bone; instead offer chews, such as rawhide or bully sticks, that’ll keep him occupied and his mind off burying.
Erect Prickly Barriers
Place pruned rose or holly branches around your garden or plants. The thorns and prickly leaves will discourage your dog from entering the restricted area.
Provide a Pooch Path
If your dog cruises through your garden but leaves the veggies alone, make him a path of his own. You can lay down mulch, or even place a spare piece of carpet along your pet’s favorite route. You may have to alter your garden design a bit, but that’s better than watching puppy crash through your flowers or zucchini.
An irrigation system saves water, keeps your lawn looking great, and helps maintain your curb appeal. We’ve gathered the info to get you started.
An underground irrigation system delivers water to your landscaping at the right time, and in just the right amount, so you don’t water too much or too little. It’s relatively easy to install and makes a good DIY project.
You’ll also save money doing it yourself. A professionally installed system for a typical ¼- acre lot is $3,000 to $4,000. You can DIY it for under $1,500.
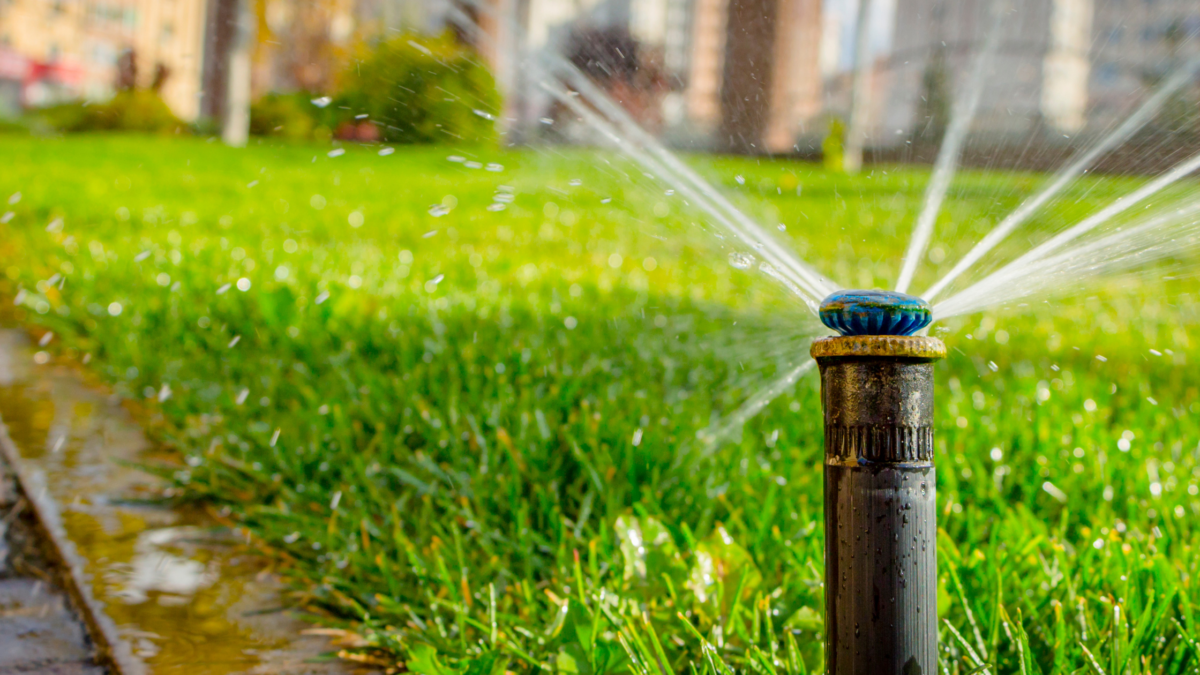
The heart of an underground system is pop-up sprinkler heads. When working, the heads raise up a few inches to spray water on your landscape. When not in use, they drop to ground level so you can mow or walk right over them.
Plus, today’s systems are pretty darn smart. Automated features decide when it’s been raining too much or too little, then adjust the amount of water your landscaping gets. That lowers the worry quotient for you, heads off costly over-watering, and makes the whole system almost maintenance-free.
Getting in the Zone
An irrigation system divides your property into zones. Each zone can be different in terms of the amount of water it gets, and at what time of day it’s watered. Examples of zones include:
Lawn zones have pop-up heads with just the right spray radius and range to cover a broad area of grass.
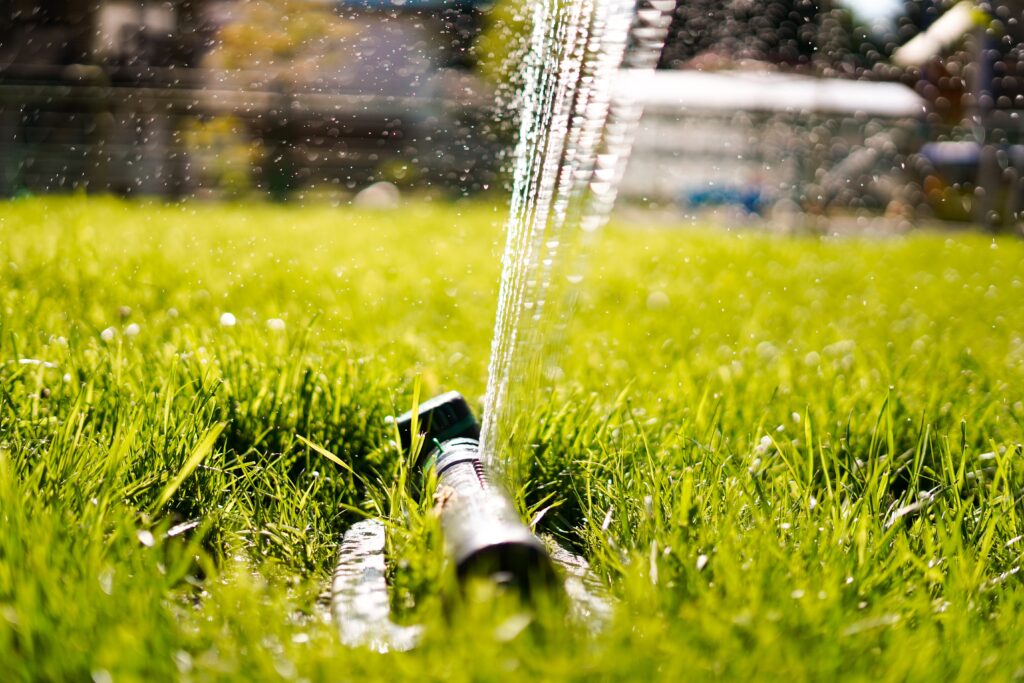
Landscaping zones have high-rise heads to water shrubs and ground cover. Flower and vegetable zones may be equipped with bubblers and tiny spray heads that gently water plants without bruising edibles or knocking petals off blooms.
Everything functions on an automatic timer that controls water flow throughout the system. You can elect to include sensors that monitor rain and humidity — self-adjusting timers that prevent unnecessary watering.
Start with a Plan
Your irrigation journey starts with a plan that maps out:
Your yard, house location, and major landscaping features, such as trees. Your irrigation zones.
The location of sprinkler heads and bubblers.
The location of underground water supply lines.
The location of a water-supply shutoff valve.
Any automatic sensors.
Planning can often be a challenge for first-timers. Manufacturers recognize this hurdle and go out of their way to provide planning help. After you give them some info on the size of your lot and your water supply system, they give you an irrigation plan tailored to your property.
You’d be crazy not to take advantage of their services. For one, they’re free. Second, they’re very thorough: downloadable guides and step-by-step videos take you through every part of creating a home irrigation system.
For example, Rainbird and Toro offer planning guides that show you how to make a scale drawing of your property, and how to easily gather information on your water pressure and water flow rate that’ll help determine the design of your system.
When you mail in the drawing and info, the manufacturer returns a custom plan with a materials list and detailed installation instructions, all designed specifically for your property. Replies take several weeks. For a small fee ($20-$30), you can have your plans arrive in a few days.
Orbit shows you how to use Google Maps to make a scaled plan of your lot without ever stepping outdoors. Plans are available instantly.
Get Ready to Dig
Your next job is trenching — digging channels in your yard for the water supply lines and sprinkler heads. With plan in hand, mark out the locations of the irrigation lines using string lines, powdered chalk, or lawn marking paint — it comes in a spray can specially designed to be used upside down ($5).
At this point comes a heads-up about your local building codes. You’ll need to ask a couple of questions of your local building and planning commission:
Do I need a permit?
Is a licensed plumber required to connect my irrigation system to my home’s water system?
How deep should the trenches be? (Most building codes require you to dig down 18 inches to protect the water lines from freezing — in colder climates the required depth is more.)
Unless you relish the idea of hand-digging several hundred feet of trench, rent a gas powered trenching tool for $100–$160 per day. This walk-behind tool makes short work of deep, narrow trenches.
Very important! To prevent injury, be sure to have all utilities marked before you begin digging. Call your local utilities or dial 811.
Installing the System
With excavation complete, you’re ready to buy all the stuff you need. You’ll build your system from plastic pipe, either rigid or flexible PVC. Both are good choices and use the same methods of assembly.
Rigid PVC pipe is inexpensive — ¾-inch diameter pipe is about 25 cents per lineal foot.
Flex PVC costs more at about $1 per lineal foot of ¾-inch-diameter pipe, but it installs faster, there are fewer connections, and it’s more forgiving of trenches that aren’t perfectly straight.
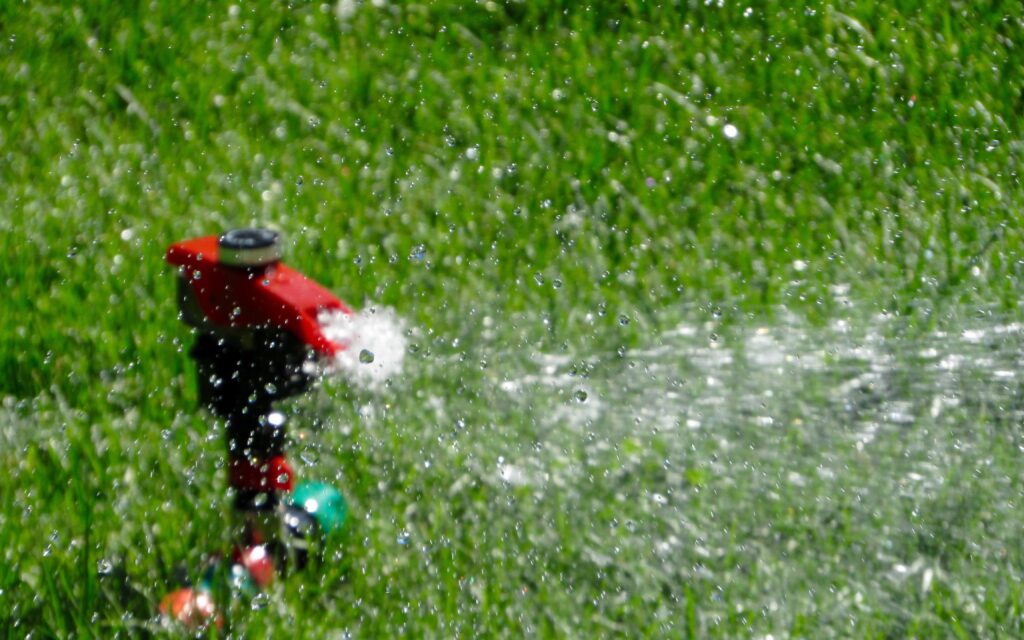
There are lots of other components, including sprinkler heads and bubblers, and each type has different ranges and arcs — the size and shape of their spray. That’s another reason to check out the manufacturer’s guides — they’ll give you a complete materials list.
Unless you’re an accomplished DIY electrician and plumber, you’ll probably need a bit more professional help:
An electrician to extend a circuit to the automatic timer; figure 2-3 hours at $90-$110 per hour.
A plumber to tap into your household water system. Budget another $200-$300.
Ready to Call In the Pros?
If the DIY approach is more than you want to tackle, or your lot is larger than a third of an acre (14,500 sq. ft.), consider hiring a pro. Expect to pay $3,000-$4,000 to have an underground irrigation system installed on a ¼-acre lot.
Aside from saving you a lot of work, a pro is going to get the job done quickly and with minimal disruption. He’ll also come with knowledge of what design best suits local conditions.
Good Tips for Watering Your Landscape
Check out these low-cost, low-maintenance DIY watering systems.
Planning a trip this summer? Here’s how to water while you’re on vacation. Dry spells are hard on your plants. Make sure you know how to water your plants during a drought.
Originally written by: Dave Toht , Originally Published: April 10, 2013
With a pandemic still a present factor in all of our lives home is literally the center of your universe right now. And ensuring that it is a source of minimum stress is essential to keeping sane.
Here are some habits you can practice daily to ensure your house is clean and orderly all the time.
Photo Credit: Volha Flaxeco
1. Wake, and make your bed pronto. That’s one task down already.
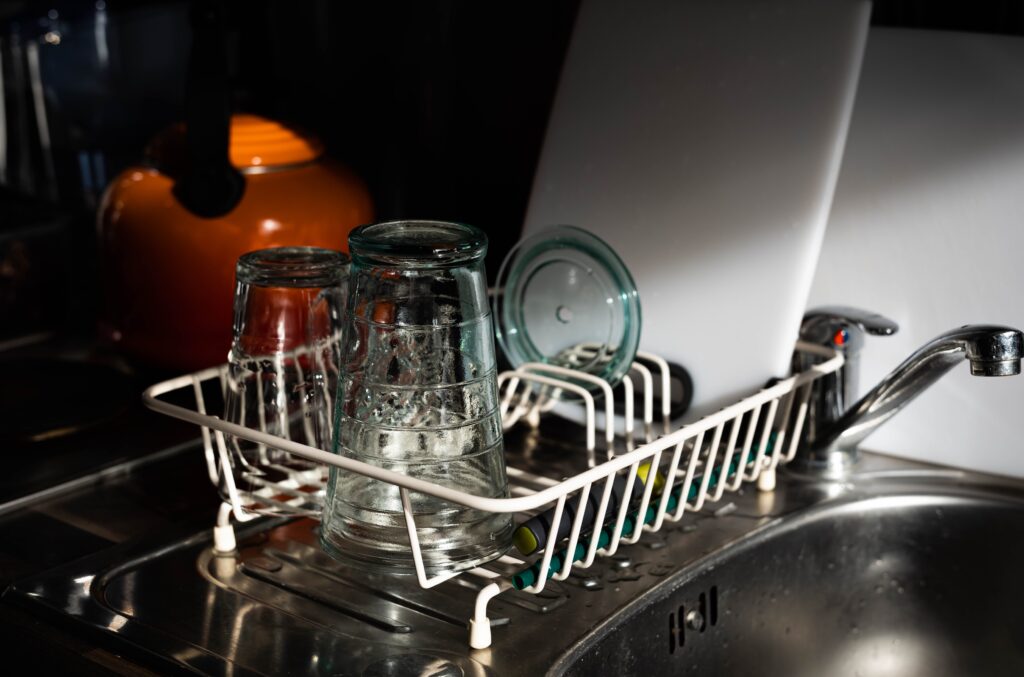
2. Keep your kitchen sink empty for a soothingly clear sight line.
3. Clean a room a day. You know what they say about doing daunting tasks in small chunks, right?
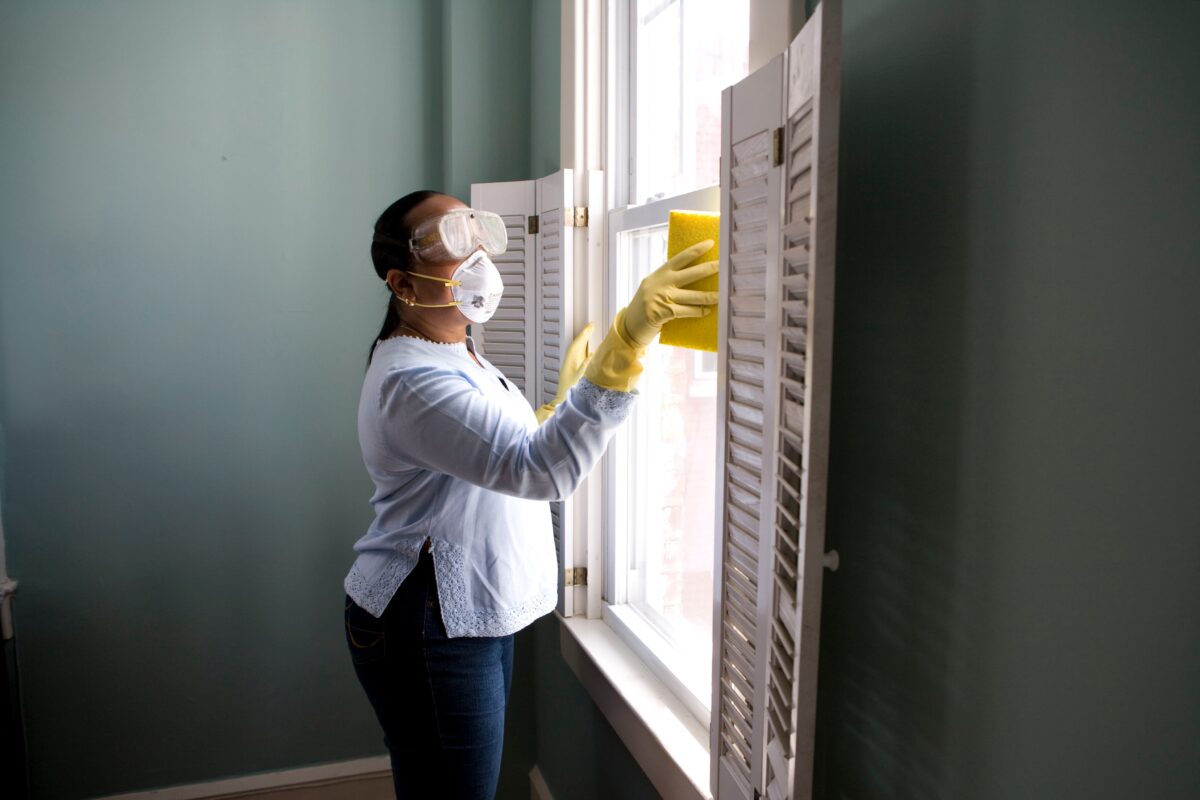
Photo Credit: CDC
4. Hang a squeegee. Take a few satisfying swipes after your shower, and presto!
5. Assign cubbies to each family member. Tidy is as tidy does.
Photo Credit: Zhijian Dai
6. Unload the dishwasher when clean. Then you’re always prepped for habit #2.
7. Use it, wipe it. Especially high-touch surfaces.
8. Snap it, shred it. Paper piles are for the birds.
9. Create a doorway box. Next time you leave, donations and recycling leave with you.
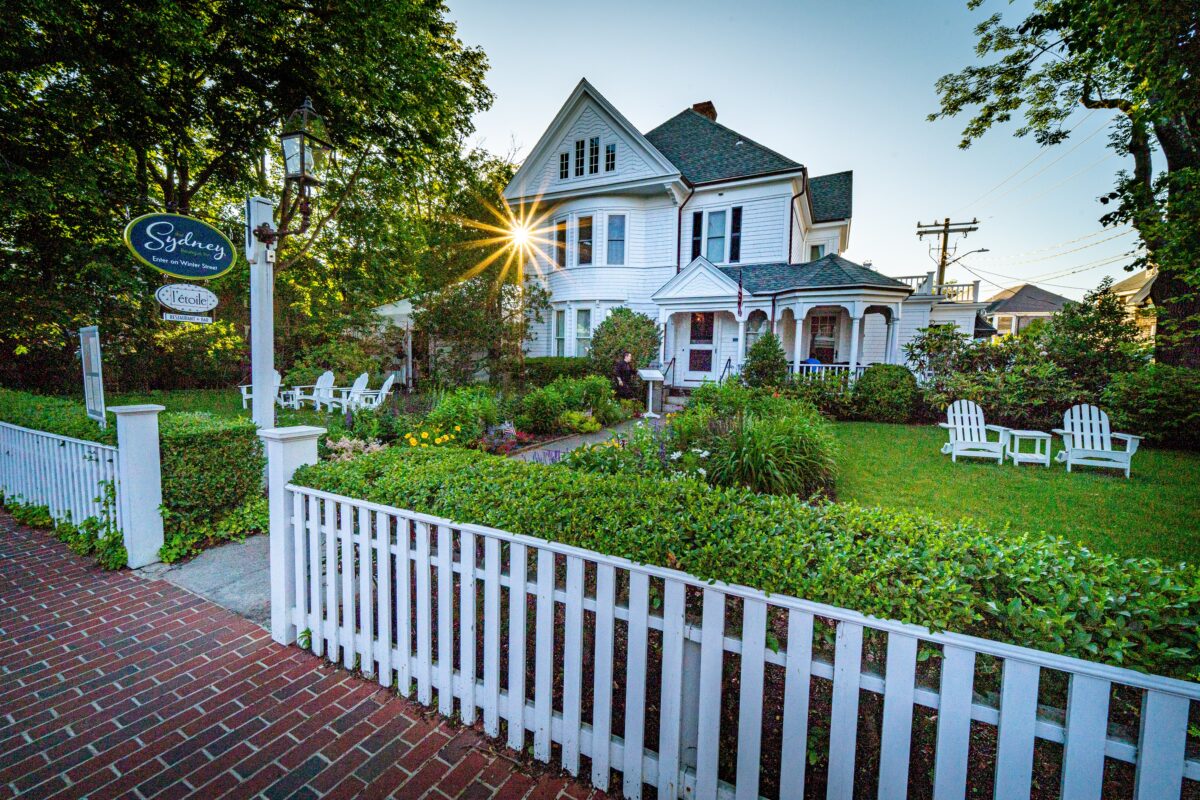
Even if you can’t tell a sunflower from a daisy at the garden center, you can still create eye-catching curb appeal by paying attention to the basics of good landscaping, especially in the front yard. Your front yard is the focal point of your homes and it’s appearance can significantly impact it’s value.
The American Society of Landscape Architects (ASLA) recommends investing 10% of your home’s value in landscaping; Other studies suggest that you can increase your home’s value by 5% to 15% by spending the equivalent percentage on landscape maintenance and upgrades.
Photo credit: Tania Melnyczuk
Here are the top suggestions from real estate agents, appraisers, and landscape designers for boosting the curb appeal of your yard:
1. Plant a Tree
Photo credit: Gibbon Fitzgibbon
The value of mature trees is particularly difficult to determine. Lucco says that in his market, mature trees contribute as much as 10% of a $100,000 property’s overall value. In addition, a properly placed shade tree can shave as much as $32 a year on your energy bills. Expect to pay $50-$100 for a young, 6- to 7-foot deciduous tree. You can make your own initial assessment of the value of your property’s trees by visiting the National Tree Benefit Calculator. For example, a mature Southern red oak tree with a diameter of 36 inches in the front yard of a house in Augusta, Ga., might add $70 to the property value.
2. Green Up the Grass
If your house has a front yard, make sure it‘s neat and green by following a lawn maintenance calendar. You don’t want bare spots, sprawling weeds, or an untrimmed appearance. “It’s so simple to go to Home Depot, buy fertilizer, apply it every six weeks, and water it,” says Mitch Kalamian, a landscape designer in Huntington Beach, Calif. “It will green up.”
Photo credit: Luke Tanis
If the yard looks really scruffy, you may decide to invest in some sod. Sod will average about 15-35 cents/sq. ft., according to the National Gardening Association. If you hire a landscaper to sod your yard for you, labor will add 30% to 50% to the total cost of the project. Another alternative is to plant low-maintenance turf grasses. Turf grasses are durable and drought-resistant. Expect to pay $18-$30 for enough turf grass seed to plant 1,000 sq. ft. of lawn area.
3. Landscape Lighting
For homeowners who have made a sizeable investment in landscaping, it makes sense to think about adding another 10%-15% to the bill for professional outdoor lighting. After all, buyers aren’t always looking at houses on a Saturday afternoon.” The cost of a system runs from $200 for a DIY installation to more than $4,000 for a professional job. If you‘re doing it on your own, the key is to light what you want people to see, such as mature trees and flowering shrubs.
4. Colorful Planting Beds
Flower beds add color and help enliven otherwise plain areas, such as along driveways and the edges of walkways. In general, annual flowers are a bit cheaper but must be replaced every year. Perennials cost a bit more but come back annually and usually get larger or spread with each growing season.
Photo credit: Jan Canty
If you’re not sure what to plant, inquire at your local garden center. Often, they’ll have a display of bedding plants chosen for their adaptability to your area. Also, they‘ll be inexpensive because they’re in season, says Peter Mezitt, president of Weston Nurseries in Hopkinton, Mass. Try pansies in the summer, and asters and mums in the fall to add vibrant color. “That’s what we do around the entrance to our garden center,” Mezitt says.
Valerie Torelli, a REALTOR® in California, who dresses up her clients’ yards to sell their houses faster and for more money, says that in her market, she can put in a bed of colorful annuals and bark, as well as cutting down overgrown shrubs, for less than $500. “We can buy gorgeous plants for $3.99 to $15.99,” she says.
Get organized without adding to your home time burden.
Did you ever notice that your self-improvement pacts with yourself are action oriented? Practice yoga daily. Fix that leaky faucet. Volunteer twice a year.
But “get organized”? It’s a goal so broad that just trying to figure out what action to take makes you wonder what you were thinking in the first place. It’s like you need an organizing plan for your organizing. Well look no further!
Here it is. Follow these steps, spending less than an hour day (sometimes just a few moments), to a better organized home:
Do That Project
“What about your space is making you feel uncomfortable or overwhelmed?” asks Amy Trager, a professional organizer in Chicago. Is it the paperwork disaster in your office? The pile of clothes teetering on your dresser? Or that mess that surrounds your doorway? Start with what’s annoying you, she says. One hour on that task will get your organizing engine revving.
Photo Credit: Nick Monge
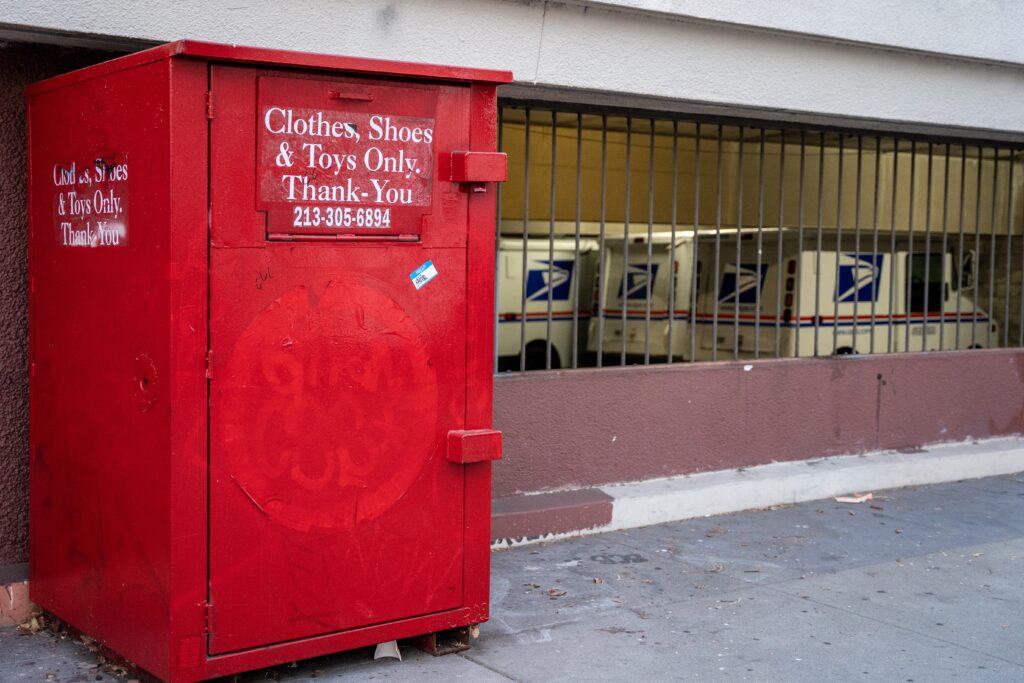
Create a “Go Away” Box
Put anything you’re planning to donate in it (or give to a friend, or take to recycle). And keep it by the door so you can easily grab it when you’re leaving.
Deal With the Decorations
Hallelujah — the holidays are over! When you’re putting away your décor, donate anything you didn’t bring out last season, and separate decorations by holiday. No need to dig through your St. Patty’s clovers when you’re searching for a menorah.
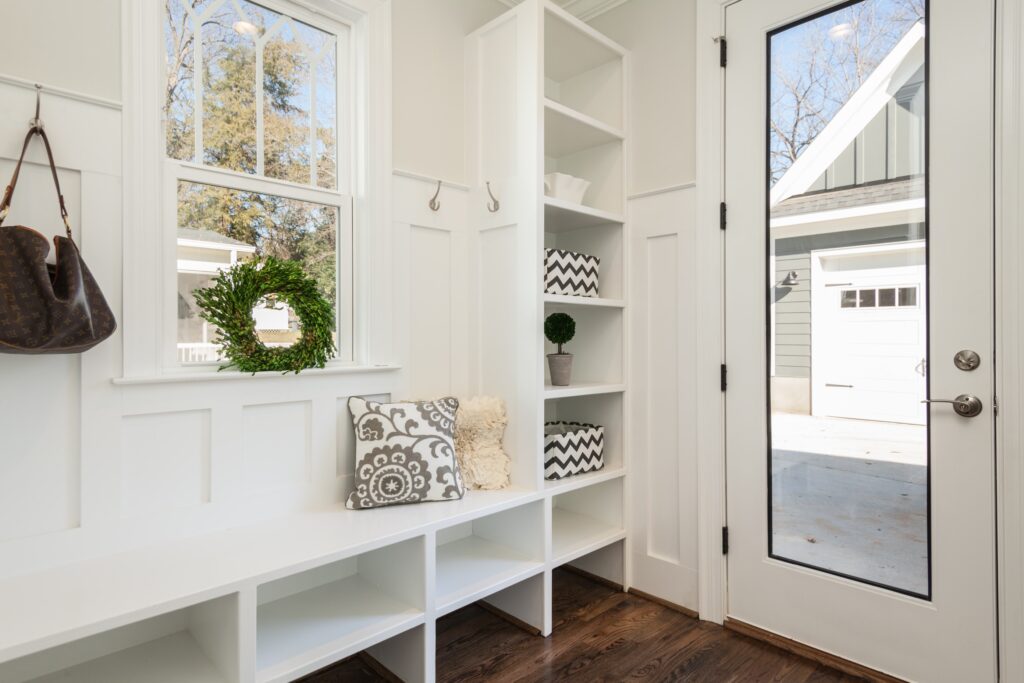
Create a System for Your Entryway
Set up a “command center” so your front door doesn’t become a lawless accessories arena, especially during winter months. Add hooks for coats, bins for shoes, and a mail sorter if you need it. (Remember to keep a place for your “go away” box).
Photo Credit: Douglas Sheppard
Wrangle Your Pet Supplies
Minimize the time spent scrambling when your pup is desperate for a walk or eager for a meal. Hang hooks and cubbies near the door and keep leashes, kibble, bowls, and toys in one convenient spot.
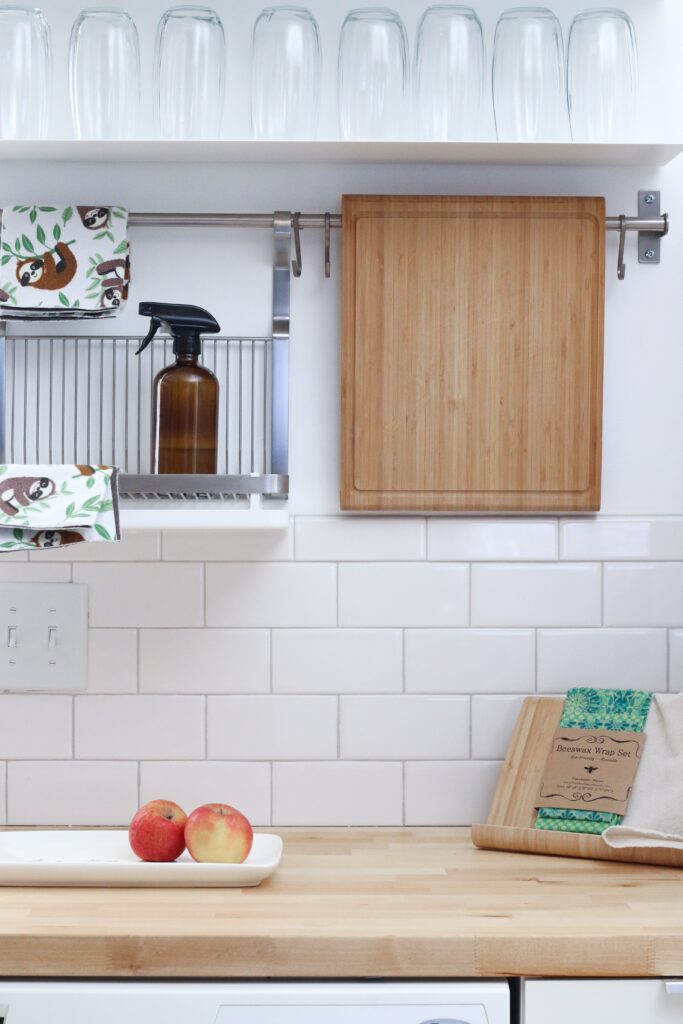
Organize Your Spices
Arrange your herbs and spices alphabetically, by cuisine, or by brand — whatever makes them easier to find when you’re in the middle of your noodle stir fry.
Pare Down Your Utensils
You’ve accumulated several dozen kitchen utensils in your culinary career: can openers, microplanes, four (what?!) wine openers. Pare down the collection and use drawer dividers to keep the remainders in order.
Reconfigure Your Pots and Pans
Stop digging around in your shelves for the oversized, cast-iron skillet. Donate the pots and pans you hardly use, and install cupboard organizers to help manage the rest.
Throw Away Expired Foods
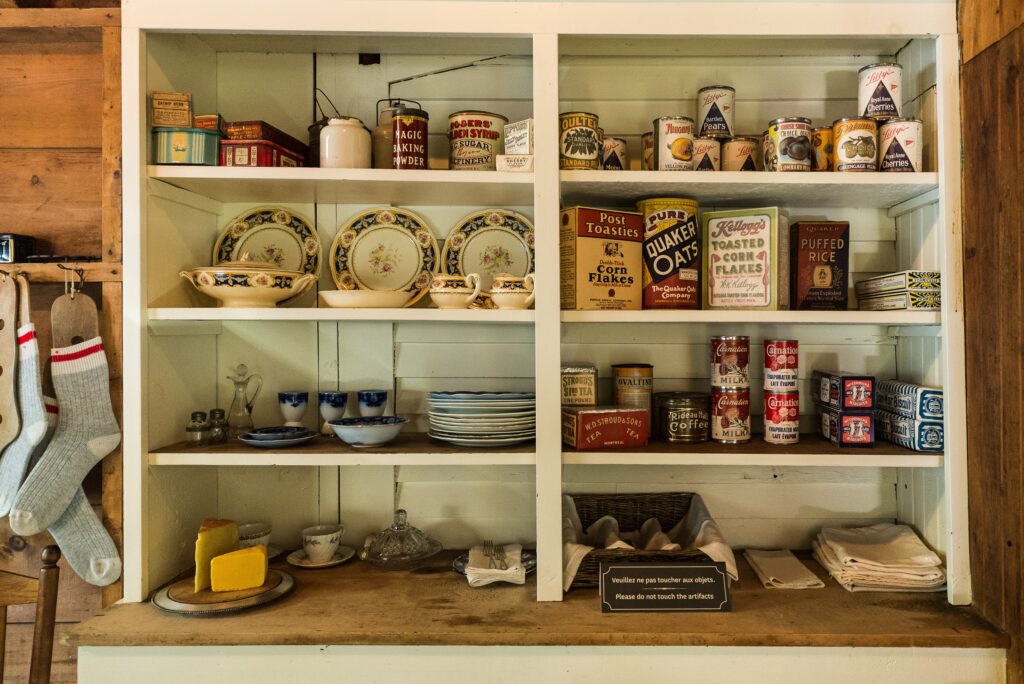
You never use Worcestershire sauce — except that one time. Go through your refrigerator and pantry and ditch or donate anything past its prime.
Make better use of your pantry by sorting through your staple dry goods — think flour, sugar, pasta, oatmeal, dry beans — and putting them in airtight, stackable containers. You’ll free up a ton of space, too.
Downsize Your Kitchen Gadgets
You had noble intentions when you purchased that spiralizer. (Zucchini noodles every night, right?) Give those space hogs to someone else with lofty dreams.
Say No to Coffee Mug Over-Saturation
Every time you lose a sock, a new coffee mug appears. Keep one or two mugs for every coffee or tea drinker, and donate the rest.
Sort Your Food Storage Containers
No singles allowed. Toss any tops or bottoms that have no mates.
Reassess Your Display Shelves
Shelves crammed with knickknacks, books you’ll never read, and stuff you somehow accumulated are just a waste of space. Donate books to the library, discard the junk, and arrange what’s left in a way that pleases you.
Deal With Your Cables
With a Roku, PlayStation, DVD player, and a cable box, it’s no surprise your entertainment center is a mess. Create ID tags for each plug from bread tags or cable ties, and bundle the clutter together with velcro strips.
Put Clothes on New Hangers
Switch your clothes over to the slimmer, grabbier hangers. They use less space and keep your clothes from sliding down to your closet floor. As you do this, discard the clothes you never wear.
Corral Your Accessories
Belts, scarves, purses, hats — all the accessories that don’t have a drawer or spot in the closet can end up everywhere. Buy an accessories hanger or install a simple series of hooks to give your wardrobe’s smallest members a home.
Purge Under the Bed
Under-bed storage is ideal for out-of-season clothing. But when out-of-season becomes out-of-sight and out-of-mind, clear out those clothes you’ll never wear again from this precious storage space.
Photo Credit: Ferenc Horvath
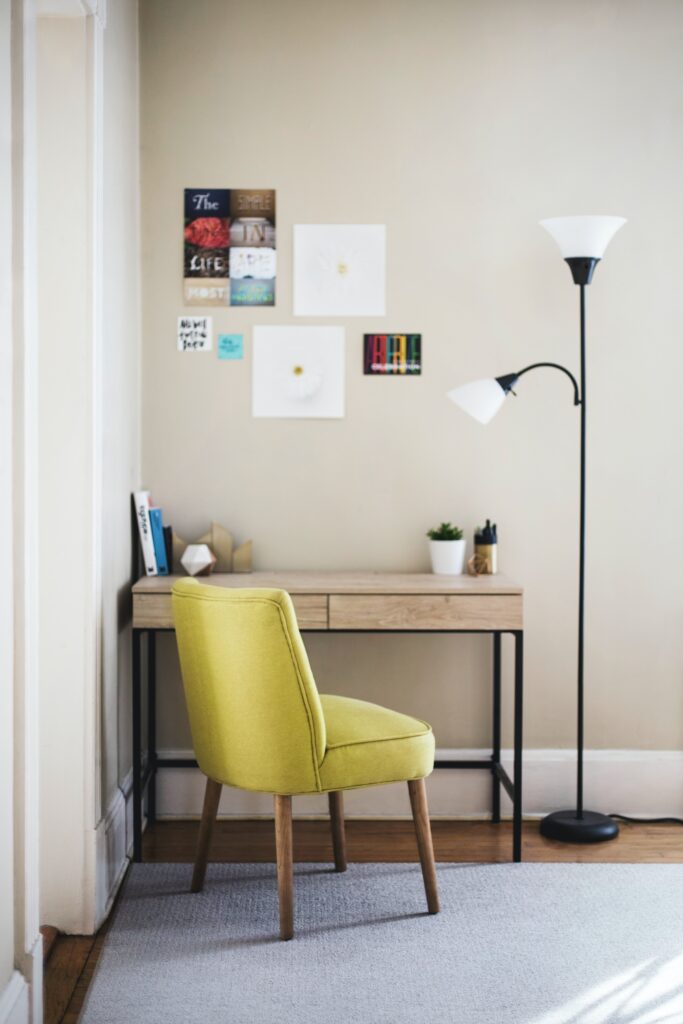
Declutter Your Desk
When your workspace is swimming with collectibles, staplers, Post-its, and more, paring down can keep you focused when it’s time to hunker down.
Shred Old Paperwork
Not every form, statement, and tax record needs to stay in your filing cabinet forever. Check out this list to make sure you’re not wasting space. Shred the rest to ward off identity thieves.
Tidy Your Files
Now that you’ve shredded the paperwork you don’t need, tidy up your files by organizing them and labeling them clearly. Colorful folders can help organize by theme (home stuff, tax stuff, work stuff, etc.).
Get Rid of Mystery Electronics
Admit it. You’ve got a drawer where black mystery cords, chargers, and oddball electronic bits go to die. Free that drawer up for better uses, or at least get rid of the ones you know for sure are “dead.”
Pare Down Your Personal Care Stuff
Your intentions were honorable when you bought that curl-enhancing shampoo — but it expired two years ago, and you haven’t used it since. Throw away any expired potions, salves, hair products, and medicines.
Tackle Under-the-Sink Storage
Clean everything out. You’ll be amazed at what you find (like those Magic Erasers you could never find). Then put back everything you’re keeping in bins you can easily pull out so nothing gets lost again.
Hang a Shelf
Wall storage is so often overlooked. Find a spot in your home where a shelf would solve a problem, and hang it. Maybe it’s for some toiletries in the bathroom, or laundry supplies, or for your kid’s stuffed toys.
Reduce Your Towels and Linens
There are the towels you use — and the stack of towels you never use. Donate them to the animal shelter. Those torn pillowcases? Convert to rags or toss. Same for napkins, dishtowels, pot holders, etc.
Hang a Shoe Organizer
Hanging shoe organizers can solve a ton of storage problems beyond the obvious. They can store scarves, mittens, cleaning supplies, craft supplies. You can even cut them to custom-fit inside a cabinet door.
Organize Your Junk Drawer for Good
There’s no shame in a junk drawer — but why not organize it? Dump the whole thing on one surface and sort everything into piles. Use drawer dividers to keep each pile in its own space.
Photo credit: Maxim Shklyaev
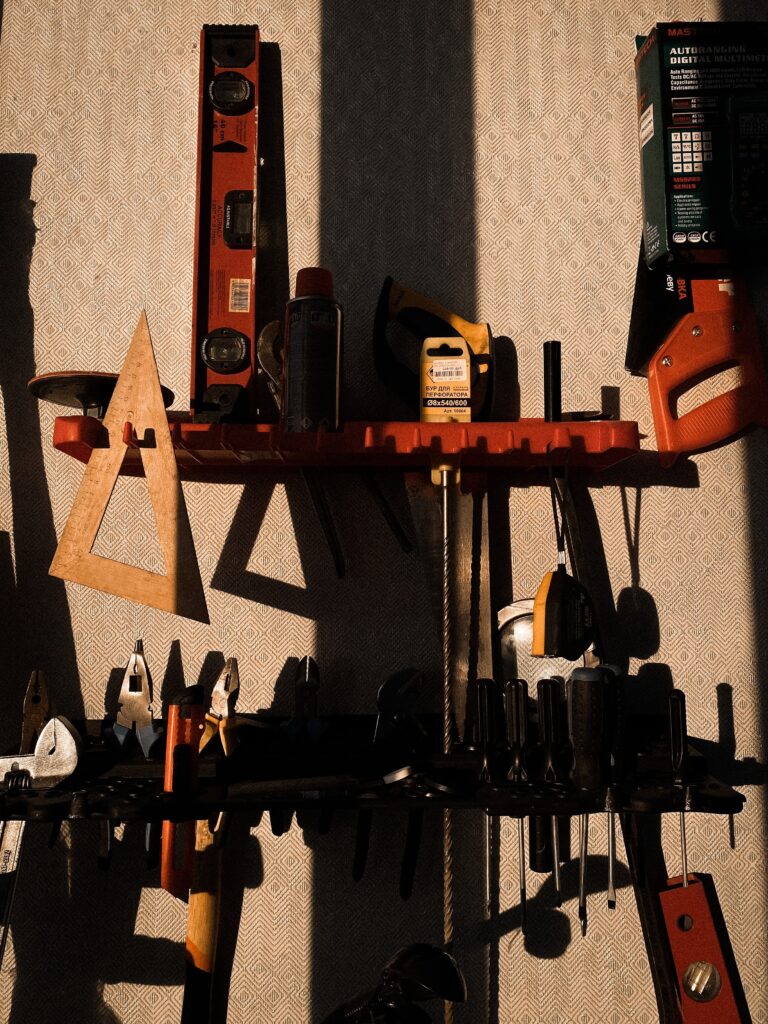
Store Your Tools the Right Way
Finding the right Phillips-head screwdriver to put together that cute IKEA bookshelf shouldn’t be so hard. Track down your hammers and screwdrivers, and arrange them in one easy-to-access spot, such as a pegboard.
Plan for the Future
See how much you’ve accomplished! Take a look around your newly organized home, making note of any spaces you missed. Then dream a bit about your next home project. Maybe paint that dining room, finally?
When you’re ready to close on the sale of your home and start moving out, it is easy to think there is nothing left for you to do. Well that’s not the case. Often, at closing time dollars can be wasted and mistakes creep into your closing documents, which add up to a heap of lost profit. Prevent money-losing problems with these seven tips.
1. Take services out of your name.
Avoid a dispute with the buyers after closing over things like fees for the cable service you forgot to discontinue. Contact every utility and service provider to end or transfer service to your new address as of the closing date.
If you’re on an automatic-fill schedule for heating oil or propane, don’t pay for a pre-closing refill that provides free fuel for the new owner. Contact your insurer to terminate coverage on your old home, get coverage on your new home, and ask whether you’re entitled to a refund of prepaid premium.
2. Spread the word on your change of address.
Provide the post office with your forwarding address two to four weeks before the closing.
Also notify credit card companies, publication subscription departments, friends and family, and your financial institutions of your new address.
3. Manage the movers.
Scrutinize your moving company’s estimate. If you’re making a long distance move, which is often billed according to weight, note the weight of your property and watch so the movers don’t use excessive padding to boost the weight. Also check with your homeowners insurer about coverage for your move. Usually movers cover only what they pack.
4. Do the settlement math.
Title company employees are only human, so they can make mistakes. Before your closing, check the math on your closing disclosure and compare it with your loan estimate.
5. Review charges on your closing docs.
Are all mortgages being paid off, and are the payoff amounts correct? If your real estate agent promised you extras — such as a discounted commission or a home warranty policy — make sure that’s included.
Also check whether your real estate agent or title company added fees that weren’t disclosed earlier. If any party suggests leaving items off the docs, consult a lawyer about whether that might expose you to legal risk.
6. Search for missing credits.
Be sure the settlement company properly credited you for prepaid expenses, such as property taxes and homeowners association fees, if applicable.
If you’ve prepaid taxes for the year, you’re entitled to a credit for the time you no longer own the home.
Have you been credited for heating oil or propane left in the tank? make sure to look into these areas.
7. Don’t leave money in escrow.
End your home sale closing with nothing unresolved. Make sure the title company releases money already held in escrow for you, and avoid leaving sales proceeds in a new escrow to be haggled over later.
If you are considering purchasing a home, you probably have been told at some point in your life that you will need at least a 20% down payment, right? Well, that is actually one of the biggest misconceptions of home buying?
When venturing on the path to purchase our first property, often we begin stowing away savings to accumulate a down payment, usually the daunting sum of 20% of a home’s cost.
Here are five creative ways to build your down-payment nest egg quicker than you may have ever envisioned.
Crowdsource Your Dream Home
You may have heard of people using sites like Kickstarter to fund creative projects like short films and concert tours. Well, who says you can’t crowdsource your first home? Forget the traditional registry, the fine china, and the 16-speed blender. Use sites like Feather the Nest and Hatch My House to raise your down payment. Hatch My House says it’s helped Americans raise more than $2 million for down payments.
Ask the Seller to Help (No, Really, Ask Them!)
When sellers want to a get a deal done quickly, they might be willing to assist buyers with the closing costs. Fewer closing costs = more money you can apply toward your deposit. “They’re called seller concessions,” says Ray Rodriguez, regional mortgage sales manager for the New York metro area at TD Bank. Talk with your real estate agent. She might help you negotiate for something like 2% of the overall sales price in concessions to help with the closing costs.
There are limits on concessions depending on the type of mortgage you get. For FHA mortgages, the cap is 6% of the sale price. For Fannie Mae-guaranteed loans, the caps vary between 3% and 9%, depending on the ratio between how much you put down and the amount you finance. Individual banks have varying caps on concessions. No matter where they net out, concessions must be part of the purchase contract.
Look into Government Options
The U.S. Department of Housing and Urban Development, or HUD, offers a number of homeownership programs, including assistance with down payment and closing costs. These are typically available for people who meet particular income or location requirements. HUD has a list of links by state that direct you to the appropriate page for information about your state. HUD offers help based on profession as well. If you’re a law enforcement officer, firefighter, teacher, or EMT, you may be eligible under its Good Neighbor Next Door Sales Program for a 50% discount on a house’s HUD-appraised value in “revitalization areas.” Those areas are designated by Congress for homeownership opportunities. And if you qualify for an FHA-insured mortgage under this program, the down payment is only $100; you can even finance the closing costs.
For veterans, the VA will guarantee part of a home loan through commercial lenders. Often, there’s no down payment or private mortgage insurance required, and the program helps borrowers secure a competitive interest rate.
Some cities also offer homeownership help.
Check with Your Employer
Employer Assisted Housing (EAH) programs help connect low- to moderate-income workers with down payment assistance through their employer. In Pennsylvania, if you work for a participating EAH employer, you can apply for a loan of up to $8,000 for down payment and closing cost assistance. The loan is interest-free and borrowers have 10 years to pay it back. Washington University in St. Louis offers forgivable loans to qualified employees who want to purchase housing in specific city neighborhoods. University employees receive the lesser of 5% of the purchase price or $6,000 toward down payment or closing costs. Ask the human resources or benefits personnel at your employer if the company is part of an EAH program.
Finally, many lenders offer programs to help people buy a home with a small down payment. “I would say that the biggest misconception [of home buying] is that you need 20% for the down payment of a house,” says Rodriguez. “There are a lot of programs out there that need a total of 3% or 3.5% down.” FHA mortgages, for example, can require as little as 3.5%. But bear in mind that there are both upfront and monthly mortgage insurance payments. “The mortgage insurance could add another $300 to your monthly mortgage payment,” Rodriguez says.
Some lender programs go even further. TD Bank, for example, offers a 3% down payment with no mortgage insurance program, and other banks may have similar offerings. “Check with your regional bank,” Rodriguez says. “Maybe they have their own first-time buyer program.”
Now does saving for a down payment seem so cumbersome? There is actually a lot of help available to first-time buyers who want to achieve their homeownership dreams. All you need to do is a little research — and start peeking at those home listings!
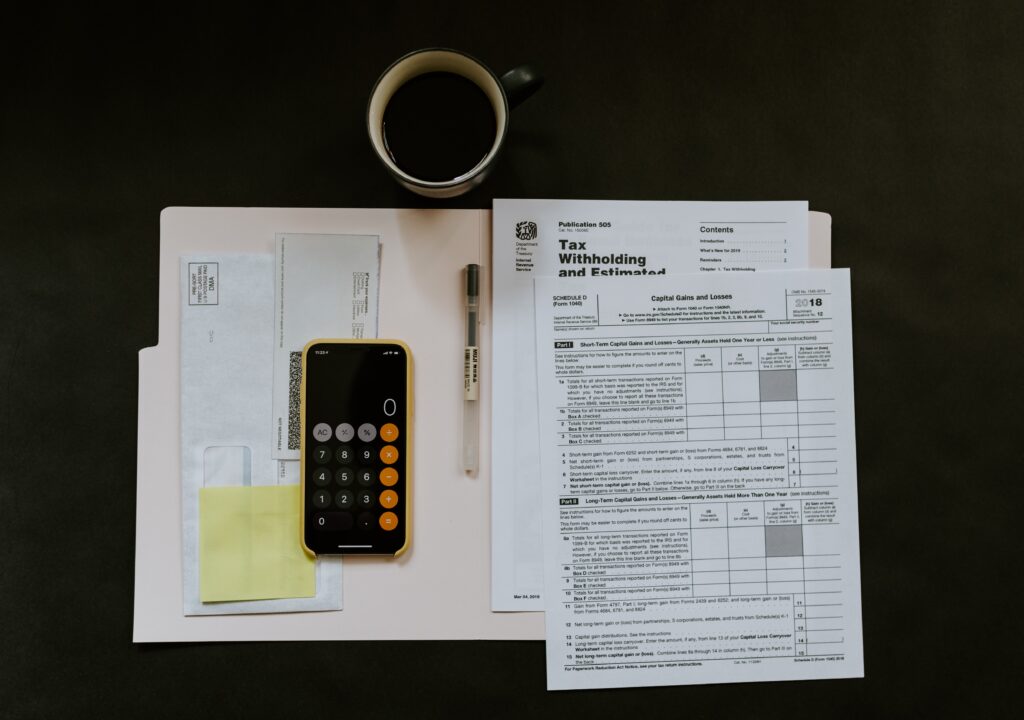
For the average person the thought of filing taxes can be daunting. Making sure you have all of your paperwork, deductions, and income correctly laid out is stressful enough. But as a new or seasoned home owner there are several mistake we can be making when it comes to filing our taxes correctly.
Therefore as we all prepare to file our 2020 tax returns, we wanted to share the common home-related mistakes to watch out for, especially if you are taking any home office tax deductions. Tax pros say these common tax mistakes can cost you money or attract the IRS to your front porch.
1. Deducting the Wrong Year for Property Taxes
Remember that you take a tax deduction for property taxes in the year you (or the holder of your escrow account) actually paid them. Some taxing authorities work a year behind — which means, you are not billed for 2020’s property taxes until 2021. But that’s irrelevant to the feds. Therefore, you need to enter on your federal forms whatever amount you actually paid in that tax year, no matter what the date is on your tax bill. Dave Hampton, CPA, a tax department manager at the Cincinnati accounting firm of Burke & Schindler, has seen homeowners confuse payments for different years and claim the incorrect amount.
Tip: Taking this deduction requires that you itemize.
Make sure to speak with your tax preparer if you prepaid your 2021 property taxes in 2020, given the tax law changes.
If you had a property tax bill in hand, that means the tax was assessed and you should have been able to deduct it on your 2020 tax return if you itemized.
If your local taxing authority says it will accept prepayments but the tax hasn’t been assessed, just estimated, the payment likely wasn’t deductible on your 2020 tax returns.
2. Confusing Escrow Amount for Actual Taxes Paid
If your lender escrows funds to pay your property taxes, don’t just deduct the amount escrowed. The regular amount you pay into your escrow account each month to cover property taxes is probably a little more or a little less than your actual property tax bill. Your lender will adjust the amount every year or so to realign the two.
For example, your tax bill might be $1,200, but your lender may have collected $1,100 or $1,300 in escrow over the year. Deduct only $1,200 or the actual amount of property taxes paid that is noted on the Form 1098 that your lender sends. If you don’t receive Form 1098, contact the agency that collects property tax to find out how much you paid.
3. Deducting Points Paid to Refinance
In many cases, you can deduct in full the points you paid your lender to secure your mortgage for the year you bought your home, if you itemize. However, if you pay points in connection with a refinance, you must deduct the points over the life of your new loan.
For example, if you paid $2,000 in points to refinance into a 15-year mortgage, your tax deduction is $2,000 divided by 15 years, or $133 per year.
4. Miscalculating the Home Office Tax Deduction
There are two ways to calculate the home office deduction. One is complicated, has to be recaptured if you turn a profit when you sell your home, and can pique the IRS’s interest in your return. But it also can amount to more of a deduction than the simpler method.
If you don’t care to claim actual costs, which you do under the more complicated method, you can use the simplified home office deduction. If you’re eligible, you can deduct $5 per square foot up to 300 feet of office space, or up to $1,500 per year.
5. Failing to Track Home-Related Expenses
If the IRS comes a-knockin’, don’t be scrambling to compile your records. File or scan and store home office and home improvement expense receipts and other home-related documents as you go.
6. Forgetting to Keep Track of Capital Gains
If you sold your main home last year, don’t forget to report capital gains on any profit above the excluded amounts. You can typically exclude $250,000 of any profits from your income (or $500,000 if you’re married filing jointly).
So, if your cost basis for your home is $100,000 (what you paid for it plus any improvements) and you sold it for $400,000, your capital gain is $300,000. If you’re single, you owe taxes on $50,000 of gains.
However, there are minimum time limits for holding property to take advantage of the exclusions, and other details. Consult IRS Publication 523. And some high-income earners could get hit with an additional tax.
7. Claiming Too Much for the Mortgage Interest Tax Deduction
For the tax year 2020, taxpayers are allowed to deduct mortgage interest on $750,000 of home acquisition debt.
Interest on home equity loans and second mortgages continues to be deductible, but only if the proceeds of such loans are used to substantially improve the home that secures the loan. Interest on home equity loans that were used for other purposes, such as student loans, cars, vacations, are no longer deductible.
And the amount of all mortgage loans (first, second, home equity, and loans for a second home) can’t exceed the $750,000 or $1 million limits.
Please Note: This article provides general information about tax laws and consequences, but shouldn’t be relied upon as tax or legal advice applicable to particular transactions or circumstances. Consult a tax professional for such advice.
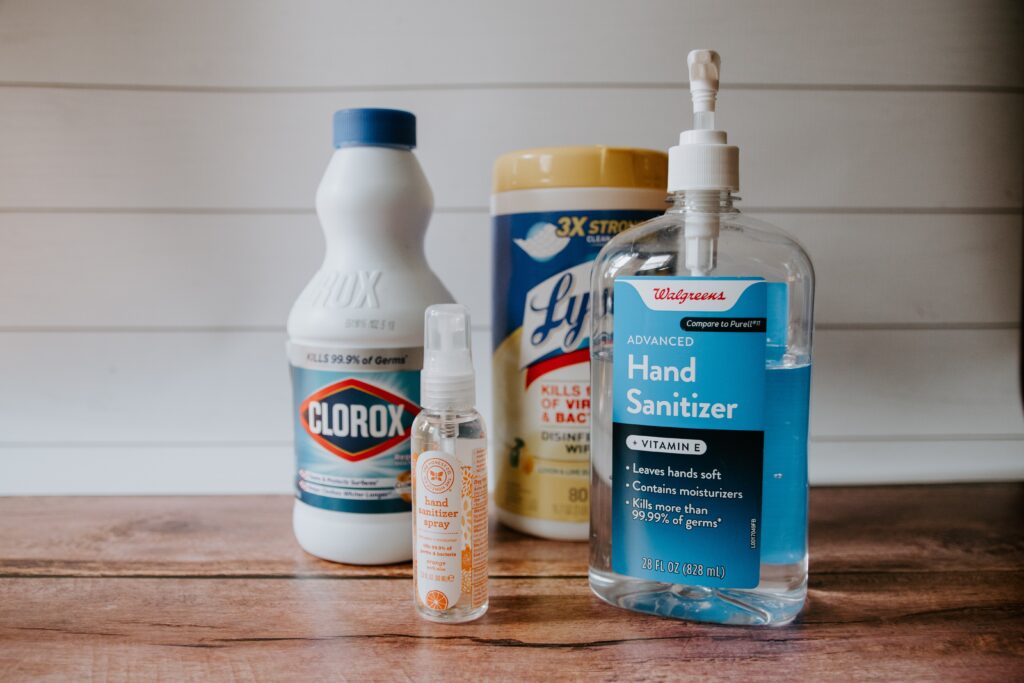
We all probably know that keeping a clean house is an important component to keeping healthy. But now more than ever, in this time that we as a world fight to overcome the deadly Coronavirus it is important to not just clean but to keep our home disinfected and sanitized. One of the most effective ways to do so is by using a bleach solution or rubbing alcohol.
Because let’s just be real, there is every day clean, guest clean, and then there’s COVID-19 clean. For that kind of clean you’ll want to break out the tough stuff: bleach, rubbing alcohol, and hot water.
The Best Disinfectants
For your high-touch surfaces, the Centers for Disease Control and Prevention recommends a bleach solution diluted with water, or a 70% alcohol solution. Here is a bleach diluting recipe to help you know the right balance.
Recipe:
5 tablespoons (1/3 cup) bleach per gallon of water
4 teaspoons of bleach per quart of water.
Make sure to properly ventilate when disinfecting with bleach. And check to see if your bleach has expired. Who knew it could? After about 9 months to a year, and if it smells less bleachy, it’s lost its disinfecting power. Time for a new jug.
Important Note: Don’t mix bleach with anything other than water; otherwise, it could set off a dangerous chemical reaction. For instance, bleach + alcohol is a deadly combo.
How to disinfect your home if you don’t have bleach? Regular old rubbing alcohol (isopropyl alcohol or ethyl alcohol) works, as long as it’s at least 70% alcohol, according to the CDC. You can find the alcohol concentration listed directly on the bottle. There is no need to dilute rubbing alcohol, as it is sold in an already diluted state.
Is There a Such a Thing as Too Much Disinfectant?
According to an EPA fact sheet, studies have found that using certain disinfectant products can cause germs to become resistant. The EPA has issued a list of disinfectants on the market that it believes are effective in killing COVID- 19. Look for the EPA registration number on the product and check it against this list to ensure you have a match. Erica Marie Hartman, an environmental microbiologist at Northwestern University in Evanston, Ill., whose research focuses on resistance, confirms soap, bleach, and alcohol are your best bets.
What about the various disinfecting wipes on the market (at least if you can find them)? Hartman says the active ingredient in many of those is an ammonium compound, which could become resistant to viruses over time.
Surfaces That Need Your Attention
With your preferred disinfectant, wipe down high-touch surfaces like doorknobs, light switches, tables, remotes, banisters, toilets, sinks, and faucets daily or more often, if someone in your home is sick.
Contact time is another key aspect of surface sanitizing. “Disinfection isn’t instantaneous,” says Hartman. [For a bleach solution], you want to leave it on the surface for 10 minutes before wiping it off.”
The CDC has updated its guidance to say that Covid-19 is now thought to be spread most often by respiratory droplets. Although the virus can survive for a short time on some surfaces, it is unlikely to spread from domestic or international mail, products, or packaging.
However, people may be infected by touching a surface or object that has the virus on it and then touching their own mouth, nose, or eyes, even though this is not believed to be the main way the virus spreads.
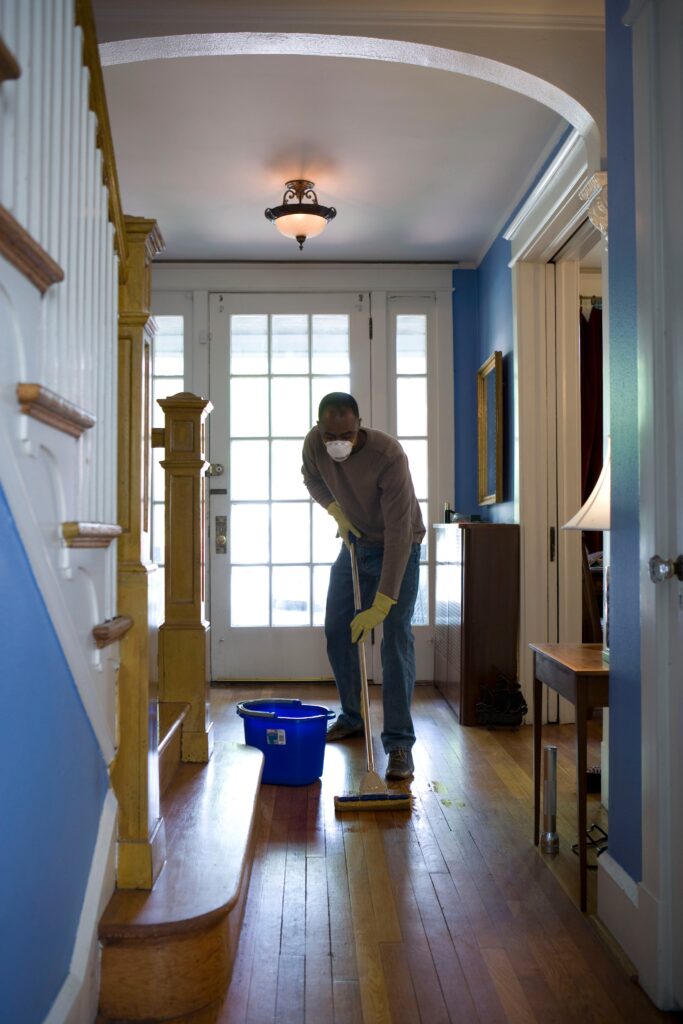
Can I Use Bleach on My Floors?
For your nonporous floors, like those in the bathroom, the CDC recommends mopping with the bleach solution. Avoid bleach on hardwood and other porous floors because of staining. Instead, use a disinfecting wet mop cloth without bleach.
Cleaning vs. Disinfecting
Disinfecting with bleach isn’t actually cleaning. If you also need to clean your countertops of dirt and grime, do that first with soap and water. Then use the bleach solution or rubbing alcohol to combat the virus.
Killing Microbes on Clothes
Most washing machines today do a bang-up job on dirty clothes with cold water, which is best for energy savings. But if you have a sick person in your house, the hot-water setting followed by a high-heat dry for about a ½ hour to 45 minutes is best for virus eradication. Don’t forget about your laundry hamper. Wipe it down like you would other surfaces. You can also use a reusable liner bag, which you can launder with the clothes.
What If I’m Selling My House, Am I Inviting More Germs In?
How to disinfect your home when it’s for sale? Virtual showings and tours are the ideal, and your agent can set those up.
However, if there’s a need to have someone come in, talk to your agent who will work with you to establish a hygienic protocol, including requiring visitors to wash hands with soap and water or use hand sanitizer when they arrive, and to remove shoes or wear booties before entering. Removing shoes not only reduces dirt coming in, but potentially germs. After any showings, practice your surface wipe-down routine.
Finally, when you work with disinfectants, practice some self-care. “Alcohol and bleach can be very aggressive on your skin, so wearing rubber gloves can help protect your hands,” Hartman says.
Most couples dream of buying a home together. Plans for his and her sinks, granite counter tops, & quiet neighborhoods are just the begin of possibilities. One factor couples may not account for in the home buying process are….arguments.
Here are a few tips on how to keep the peace while house hunting.
Before you and your partner start sending each other links to the home of your dreams, have a few conversations about the home buying process. A couple buying a house should talk about money, of course, but also about their expectations for their first home. Talking now will keep you productive, positive, and focused on finding the right house. It will also help you prevent house-buying stress from affecting your relationship.
OK, we’re about to get a little “Modern Love” here.
1. Get On the Same Page About Expectations
No matter how connected you two are, there are still unspoken and undefined expectations between you. Especially when it comes to a couple buying a house. Buying a home can reveal relationship problems, because it’s the biggest financial transaction you’ll make, and there are a lot of emotions and expectations tied up in the idea of home.
Listen to your partner and commit to the idea that each person has a voice in every issue.
“That would be my No. 1 principle,” says Donna R. Baptiste, a licensed marriage and family therapist, and professor at Northwestern University’s Family Institute. “Two people must respect each other’s right to have a say.”
How to start? Ask questions like: • Why do you want to buy a house? • What’s the most important thing to consider, in your opinion? • How long do you want to live there? • Do you want something perfect or a fixer-upper? • What do you think our budget should be?
2. Be Prepared to Back Down
Not every decision will be 50-50. “Equal say is not always the standard,” Baptiste says.
But both of you should be willing to accept no for an answer. This prevents gridlock. And ceding some control makes the decision on which home to buy a shared one.
Consider the situation faced by work-from-home clothing designer Veronica Sheaffer and her husband, teacher Keith Dumbleton. They bought their prewar apartment on Chicago’s far North Side four years ago. While scrolling through listings, Sheaffer fell for the property’s vintage millwork and spacious layout, but the building was 12 miles from the centrally located neighborhood they’d been living in. Sheaffer accepted the hours the new location would add to Dumbleton’s school commute could be a deal breaker.
“I gave him the power of refusal and prepared myself for losing the place,” she says. Knowing that Sheaffer was conscious of the sacrifices he’d be making, Dumbleton agreed to move forward with making an offer. “Her being open to me saying no allowed me to make that decision, and I don’t regret it.”
3. Do Scenario Planning
New homes have a way of changing life’s routines.
Does one of you take the dog out? If so, that beautiful sixth-floor walk-up may affect the dog caretaker’s mornings (and moods). Does one of you do most of the outdoor chores? How do you really feel about taking care of a massive lawn? That house that sits on top of a hill is gorgeous, and the views! But will you like hauling bags of groceries up the three flights of stairs to the front door?
“I ask a couple to have it sink in,” says Dan Sullivan, a REALTOR® at Compass in Chicago. “What is it going to physically be like living in that property, day in and day out?”
The more you think it over together, the happier you’ll both be after you move in.
4. Ask An Expert
As a couple buying a house, you may be in full agreement or you may be at an impasse, but either way talk to a real estate agent and, as Baptiste recommends, “submit to the idea of getting good advice.”
A good agent is like a reference librarian and a personal coach in one. They can help you navigate the home buying process minutiae, like finding a good mortgage broker or dissecting the details of a home inspection.
An agent can give you the knowledge you need to make a wise decision. And they can pump you and your partner back up when your energy has subsided because you’ve looked at 22 houses and not seen one worthy of an offer. Or you put in an offer and it fell through.
Leaning on a professional to offer perspective and help work through disappointment releases some buying-a-house stress on a relationship. “As much as possible, as early as possible, I try to get [couples] to see the big picture,” Sullivan says.
5. Recognize You’re a Team
Involving an agent in the home buying process can have another unexpected outcome, says Sheaffer. It brought her and Dumbleton closer together.
Having the agent participate in discussions — and even occasionally disagreeing with her — “helped us [see] that we know each other, we know our lifestyle. Anything that will allow you to bond more with your partner is always positive.”
The agent got them to talk to each other about what they wanted and didn’t want in a house. It helped them hash out their likes and dislikes, constructively.
Instead of letting buying a house lead to relationship problems, turn the experience into a chance to learn and grow together. Talk. Listen. And get good advice from a smart agent. You’ll end up as homeowners — with an even better connection.
What’s not to love?
Originally article written by: HouseLogic
If you found this article helpful, feel free to leave your comment below. Tell us what you liked or disliked, and what you would like to see more of.